
Directing the AI: A Practical Guide to Storyboarding with Google Flow and Nano Banana Pro
Plan a four-shot watercolor film, from visual references and camera prompts to editing and sound.

Mohit Malaya Nandy
Software Engineer & Product Builder
On this page
- 1. Start with a story small enough to direct
- 2. Establish the visual aesthetic with Nano Banana Pro
- 3. Build a storyboard before writing video prompts
- 4. Translate camera directions into clear video prompts
- 5. Choose frames or ingredients deliberately
- 6. Assemble the narrative in Scenebuilder
- 7. Let sound complete the scene
- 8. Review the film as a director
- Quick workflow checklist
- FAQ
- Sources
Generating a beautiful AI image is one creative challenge. Turning it into a story that holds together across several shots is another.
A character’s appearance changes between scenes. The lighting jumps from sunrise to midday. A camera movement looks impressive but adds nothing to the narrative.
These are directing problems—and solving them starts before you generate your first video.
Google Flow brings reference assets, video generation, and scene assembly into a shared creative workspace. Nano Banana Pro, Google’s image generation and editing model, can help establish the visual material that guides that process. Together, they offer a workflow worth exploring: define the look, plan the shots, generate the motion, and edit the story.
This guide uses a simple example: “Bengaluru Before the Rush,” a short watercolor-and-ink film about a traveler discovering a quiet morning in the city.
1. Start with a story small enough to direct#
Before opening an image generator, write one sentence describing what happens:
A traveler stops for morning chai, then walks toward a sunlit avenue as Bengaluru begins to wake.
That sentence gives us a location, a character, an action, and an emotional direction.
For this project, the mood is calm and observant. The film should encourage viewers to notice small details: rising steam, opening shutters, footsteps, and sunlight through trees.
Aim for a final edit of approximately 20–30 seconds. This is an editorial target, rather than a promise about the length of any individual generation.
A short, focused story makes it easier to identify what each shot contributes.
2. Establish the visual aesthetic with Nano Banana Pro#
For our example, the visual style is a watercolor travel journal:
- Warm, textured paper.
- Loose black ink outlines.
- Muted indigo shadows.
- Amber morning light.
- Restrained movement with a hand-painted appearance.
Google’s Nano Banana Pro prompting guidance recommends specifying the subject, composition, action, location, and style, then refining details such as lighting and aspect ratio. That provides a useful foundation for building storyboard images.
Start with a character reference:
Create a full-body character reference for a watercolor-and-ink travel film. A young Indian traveler with short curly black hair, a mustard-yellow jacket, dark trousers, and a navy backpack. Relaxed posture and a curious expression. Loose black ink outlines, muted watercolor washes, warm off-white paper texture. Plain background, clear face and clothing details, no lettering.Next, establish the environment:
Create a wide storyboard image of a quiet Bengaluru neighborhood street at dawn. A modest roadside chai stall, partly opened shop shutters, mature roadside trees, and warm sunlight entering from the right. Watercolor-and-ink illustration on textured paper, muted indigo shadows, amber highlights, restrained detail. No prominent lettering. Landscape 16:9 composition.These become your visual anchors.
When generating subsequent storyboard images, attach the approved references and explicitly identify what should remain consistent: the traveler’s face, jacket, backpack, palette, and lighting direction.
Reference images help guide consistency, but every output still needs inspection. Check the character’s silhouette and clothing before moving on to animation.
3. Build a storyboard before writing video prompts#
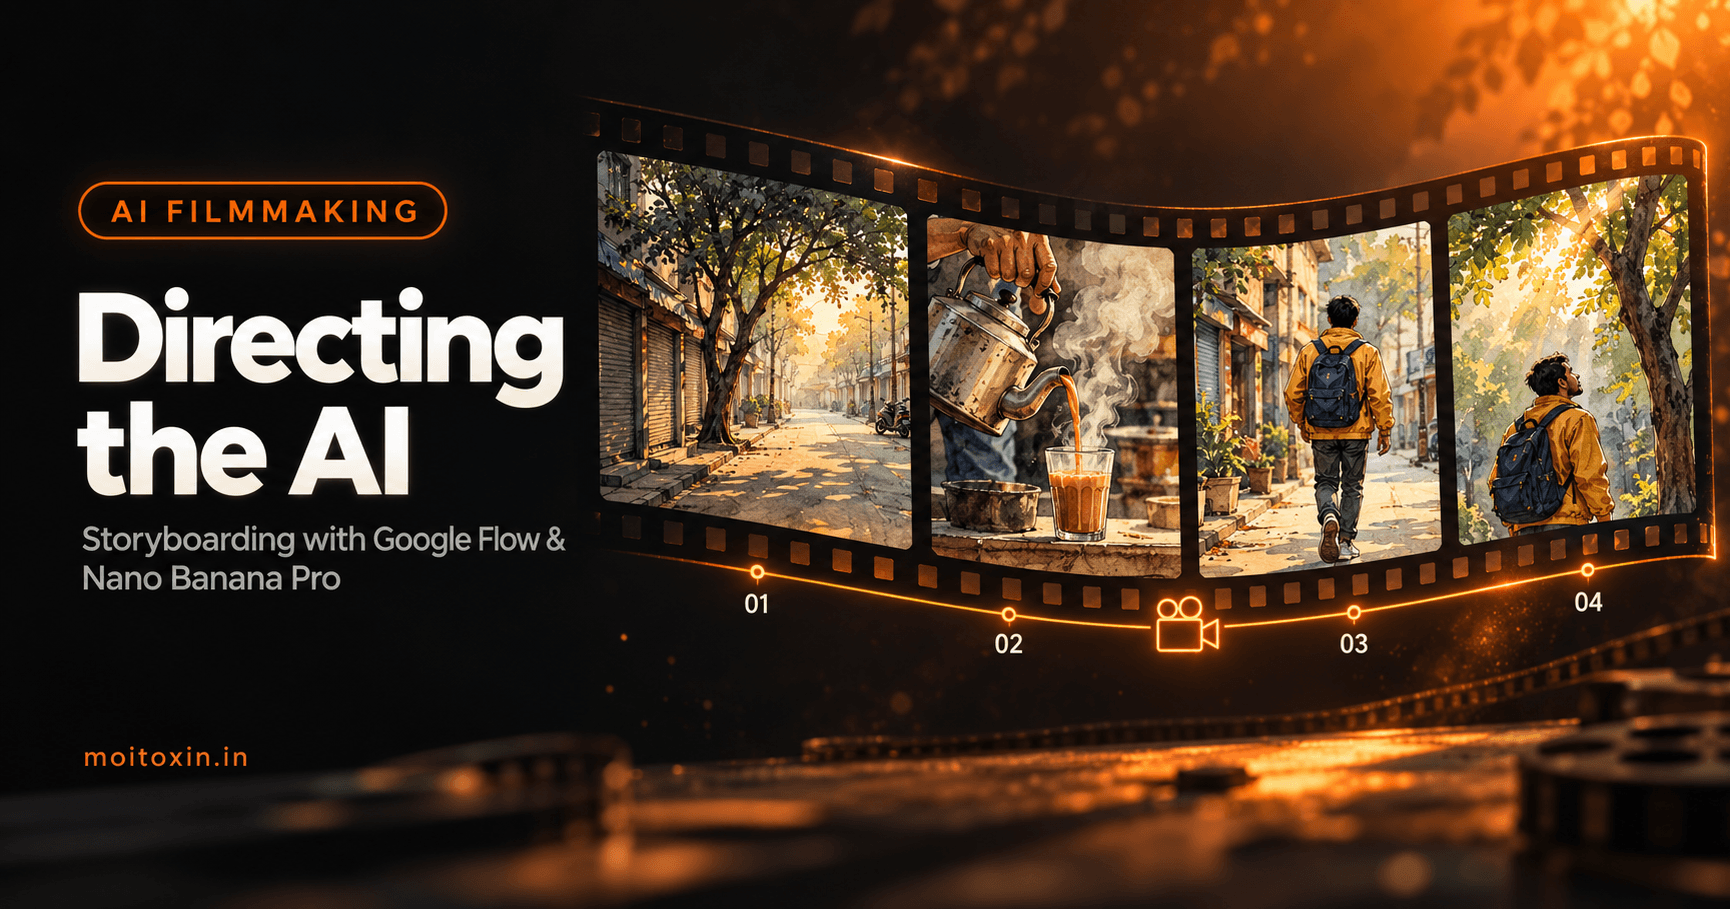
Think of the storyboard as a four-panel comic. Each panel should communicate one clear moment.
| Shot | Story purpose | Composition and movement | Sound direction |
|---|---|---|---|
| 1. The city wakes | Establish the setting | Wide street view; slow dolly toward the chai stall | Birds and distant traffic |
| 2. Morning chai | Bring the viewer closer | Close-up of chai pouring; mostly stationary camera | Pouring tea and a soft glass clink |
| 3. The walk | Move the story forward | Side-tracking shot of the traveler | Footsteps and an opening shutter |
| 4. The pause | Deliver the emotional ending | Over-the-shoulder view toward a sunlit avenue | Leaves rustling and quiet city ambience |
Generate a separate approved image for each shot. A combined storyboard sheet is useful for reviewing the sequence, but individual images are more practical as frame inputs.
Choose the intended aspect ratio now. Use 16:9 for a landscape film or 9:16 for a vertical social video, and compose every shot for that format.
4. Translate camera directions into clear video prompts#
Camera terminology becomes more useful when paired with a plain-language description.
For example, “slow dolly-in” means the camera physically moves closer to the subject. Explain what it approaches and how the framing should change.
A practical prompt structure is:
Subject + action + setting + framing + camera movement + visual style + audio
For the opening shot:
Wide view of the referenced Bengaluru street at dawn. The traveler stands beside the chai stall while the vendor prepares tea. The camera slowly moves forward toward the stall, gradually bringing it closer in the frame. Gentle steam rises from the kettle. Preserve the watercolor-and-ink appearance, mustard jacket, navy backpack, and warm light from the right. Audio: distant traffic, scattered birdsong, and a soft kettle hiss. No dialogue or music.For the detail shot:
Close-up of chai pouring from a metal kettle into a small glass on the stall counter. Keep the camera steady as the stream of tea and rising steam provide the movement. Warm amber light, delicate ink outlines, and the same watercolor palette as the reference image. Audio: tea pouring and a light glass clink. No speech.For the walking shot:
Medium side view of the referenced traveler walking from left to right past the shops. The camera tracks alongside at the same walking speed, keeping the traveler at a consistent size in the frame. The navy backpack moves gently with each step. Preserve the approved face, clothing, and illustrated style. Audio: soft footsteps, distant traffic, and a shop shutter opening.For the final shot:
Over-the-shoulder view of the traveler stopping beside a tree-lined avenue. Hold the camera nearly still as sunlight falls through the leaves. The traveler pauses and looks ahead. Maintain the watercolor texture and warm morning palette. Audio: rustling leaves and subdued city ambience. No dialogue or music.Treat these as creative instructions, not deterministic commands. Review whether the generated motion supports the intended moment.
5. Choose frames or ingredients deliberately#
In Flow, frame inputs guide how a clip begins or ends. Ingredients provide references for subjects and objects. Google documents both approaches, with support depending on the selected model.
For this project, begin with the approved storyboard image as the start frame for each shot. Describe the motion that should unfold from it.
Use an end frame when a specific final composition matters—for example, ending the opening shot closer to the stall.
Before generating, check the active model and its supported features. Avoid assuming that every model supports the same combination of references, frames, duration, and editing options.
A useful creative rule is to keep the movement between frames plausible. If one frame shows an empty street and another shows a close-up of a different location, asking for a continuous transition may produce distracting transformations. An editorial cut can tell that story more clearly.
6. Assemble the narrative in Scenebuilder#
Once you have usable clips, add them to Flow’s Scenebuilder. Google’s documented workflow supports arranging and reordering clips, trimming their beginnings and endings, previewing the sequence, and downloading the scene.
Arrange the example in this order:
Street → chai → walk → avenue
Then watch for continuity.
Does the traveler keep moving in the same screen direction? Does the morning light remain consistent? Does the chai close-up feel like it belongs to the stall in the opening shot?
Trim any beginning where the action hesitates and any ending where the image starts to drift.
When you need a shot to continue from an existing composition, Flow also lets you save a video frame and reuse it as a reference or frame input. This can provide a visual starting point for the next generation.
However, connected storytelling does not require every transition to be seamless. The cut from a wide street to a close-up of tea works because the viewer understands the relationship.
7. Let sound complete the scene#
Native audio generation lets supported Veo workflows create environmental sound and dialogue alongside the video. Google has also noted that audio results can vary, so listening is part of the review process.
For this film, start with ambience rather than narration.
Give each shot one foreground sound—the pour of tea, a glass touching the counter, or footsteps—and a quieter background layer.
Listen across cuts. A sudden change in traffic volume can break continuity even when the images match.
If the generated audio needs more control, finish the sound mix in a video editor. The same applies to precise titles, captions, and branding.
8. Review the film as a director#
Before exporting, watch the sequence once without sound, then listen without looking at the screen.
The silent review reveals visual problems: inconsistent faces, shifting objects, flickering textures, or unclear actions.
The audio review reveals abrupt transitions, unwanted speech, and sounds that compete for attention.
Fix the specific problem rather than rewriting the entire creative brief. If the camera moves too quickly, adjust the movement instruction. If the backpack changes, strengthen the reference guidance.
The value of this workflow comes from making deliberate choices throughout production.
Nano Banana Pro helps establish the images. Flow helps turn those assets into moving scenes. Your storyboard gives those scenes a reason to belong together.
Start with one character, one place, and four meaningful shots. Give the viewer a small story worth watching.
Quick workflow checklist#
- Write a one-sentence story with a place, a character, an action and a mood.
- Approve a character reference and an environment reference.
- Generate one storyboard image per shot, in your final aspect ratio.
- Write each video prompt: subject, action, setting, framing, camera movement, style, audio.
- Generate from start frames, adding end frames or ingredients only where they help.
- Arrange, trim and check continuity in Scenebuilder.
- Review once without sound and once without picture, then fix one problem at a time.
Frequently asked questions#
What is the difference between Nano Banana Pro and Google Flow?
Nano Banana Pro is Google's image generation and editing model, useful for creating consistent character, location and storyboard images. Flow is Google's AI filmmaking workspace, where you turn images and prompts into video clips and arrange them into scenes.
How do I keep a character consistent across AI video shots?
Create an approved character reference first, attach it when generating each storyboard image and clip, and name the details that must not change, such as the face, clothing, props, palette and lighting direction. Then check every output before moving on.
Should I use frames or ingredients in Flow?
Use frames when you want to control how a clip starts or ends, for example by starting from an approved storyboard image. Use ingredients when you want to give Flow references for subjects, objects or style. Supported options depend on the selected model.
How long should a first AI short film be?
Aim for about 20 to 30 seconds and four shots. A short, focused story makes it easier to judge what each shot contributes and to fix problems one at a time.
Sources and further reading#
- 5 tips for getting started with Flow, Google blog
- Flow FAQ, Google Labs
Flow and its supported models change often. Check the current options in the app before relying on a specific feature.
Found this useful? You can support my writing on GitHub Sponsors or with a coffee.